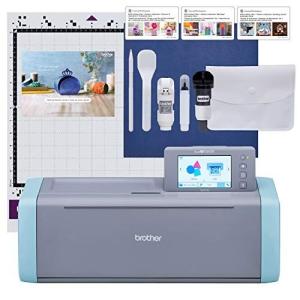
A vinyl machine, also known as a vinyl cutter, is a tool that helps you create awesome designs using vinyl sheets. This nifty piece of equipment is perfect for making stickers, decals, and signs. If you’ve got a creative side or just want to personalize items, a vinyl machine is your new best friend.
These machines work by cutting shapes out of vinyl material based on the design you create on your computer. You can use design software to craft your image, and then the machine takes care of the cutting. It’s like having your own mini printing press at home. Whether you want to create custom shirts, home décor, or labels, a vinyl machine makes it super easy.
There are a couple of different types of vinyl machines out there, including desktop models for home use and more advanced, larger versions for businesses. When choosing one, think about what you want to make and how often you plan to use it. Some machines even come with features like built-in Bluetooth, so you can send your designs wirelessly.
Using a vinyl machine is pretty straightforward. Just load your design into the cutting software, adjust the settings for the type of vinyl you’re using, and hit “cut.” It's all very user-friendly! After cutting, you’ll often use transfer tape to apply your vinyl design to whatever surface you want to customize.
Essential Features to Look For
When you're diving into the world of vinyl machines, a few key features really stand out. These aren't just bells and whistles; they make your crafting experience smoother and way more fun. First up, consider the cutting size. You want a machine that can handle various materials and sizes. A larger cutting width gives you flexibility, especially if you plan to create larger projects like signs or banners.
Next, look into the cutting precision. You'll want a machine that can slice through vinyl without any hiccups. Check reviews and specs for accuracy rates. A machine that can cut intricate designs without tearing or fraying the vinyl is worth its weight in gold!
Another important feature is the ease of use. If you’re just getting started with vinyl projects, a user-friendly interface is a must. Machines with touchscreens and simple navigation can save you a lot of headaches. Also, consider whether it comes with helpful software. Good software can make designing and managing your cuts super easy.
Don't overlook connectivity options either. Some machines connect via USB, while others offer Bluetooth capabilities. If you're someone who loves working on the go or wants to do things wirelessly, having those options is a big plus.
Finally, think about support and community. A brand with solid customer service can make a difference if you run into any issues. Plus, having an active online community can provide tips, project ideas, and troubleshooting help. It feels great to know you're not alone on your crafting journey!
Setting Up Your Vinyl Machine
Getting your vinyl machine set up doesn’t have to be a headache. First things first, unpack everything and lay out all the components. Make sure you have the main unit, power cable, and any tools or accessories that came with it. You’ll want to keep the manual handy because it’s super helpful, especially if you’re a newbie.
Next, find a good workspace. You’ll need a flat surface with plenty of room. Make sure it's well-lit too! It’s easier to see what you’re doing when you can actually see it, right? Once you have your space ready, plug in the machine. Don’t forget to turn it on! Sounds simple, but you’d be surprised how often people overlook this step.
Now, it’s time to load your vinyl. Depending on your machine, this process might vary a bit. Usually, you just need to feed the vinyl into the machine according to the guidelines in the manual. Check that it’s secure and lined up straight. If your machine has a cutting mat, make sure that’s set up correctly too.
After that, go ahead and connect your machine to your computer if it's a digital model. Download any necessary software, and you’ll be ready to start designing. Some machines work with specific programs, while others might be more flexible. Spend a few minutes getting familiar with your software so you feel comfy when you start cutting.
Tips for Successful Vinyl Projects
Getting started with vinyl projects can be super exciting, but a few tips can help ensure everything goes smoothly. Here are some handy pointers to keep in mind.
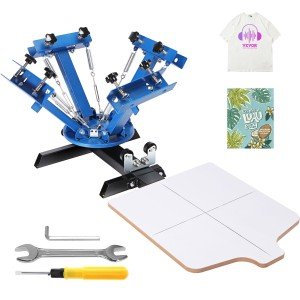
First off, always make sure to choose the right type of vinyl for your project. Adhesive vinyl is great for stickers and labels, while heat transfer vinyl (HTV) works well for clothing. Don’t forget to check compatibility with your vinyl machine, too. Each machine has its own quirks, and knowing what to use makes a big difference.
Next, prepare your designs carefully. Use software that you're comfortable with and double-check your settings before hitting that cut button. Scaling your design properly is key. You want it to fit perfectly on your material without any awkward edges showing.
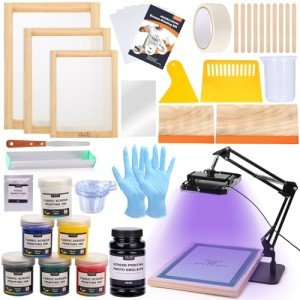
Don’t skip the weeding process! Once the vinyl is cut, take your time to remove the excess material around your design. This step really helps in achieving clean, professional-looking results. Using a weeding tool can make this task a lot easier!
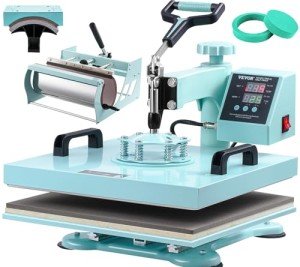
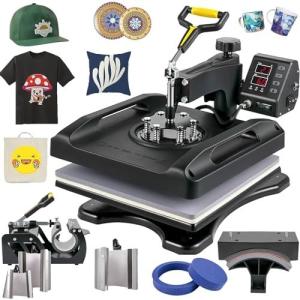
Lastly, pay attention to application techniques. For HTV, a heat press is usually the best option for even pressure and temperature. Always follow the recommended settings for the specific vinyl you’re using. If you’re working with adhesive vinyl, ensure your surface is clean and dry before sticking. Small details like these can elevate your projects from good to awesome.